Stellar Blade: Detailed Explanation of Combat System
Health and Shield
When checking the character details, it is easy to notice a huge difference between shield value and health points: health points are around 2500, while shields are only about 400-500. That’s nearly a five-fold difference.

Although shields are just a thin layer, they are extremely important. This is because when taking enemy attacks, the damage is shared between health points and shields in a certain proportion.
Each segment of the shield bar is considered a shield protection level, and the higher the shield protection level, the more damage the shield will absorb. When the shield protection level is at level 3, the shield will absorb 52.5% of the damage.

During combat, due to the decrease in shield value, the shield protection level will degrade, and it won’t remain at the highest level all the time. Once the shield is broken, all the damage will affect the health points, resulting in very high damage. This is why sometimes even with half health remaining, a boss can deliver a fatal blow, or sometimes, after taking a boss’s combo, the damage unexpectedly turns out to be low.
Shields can slowly regenerate over time but stop recovering during attacks. Holding down the block button will slow down the regeneration speed. It’s similar to the essence in Souls games.
Block/Parry/Perfect Parry
Blocking (hold L1)/Parrying (press L1 at the right timing)/Perfect Parry (press L1 at an extremely precise timing) only works against enemies’ normal attacks and red light skills. Yellow light skills require a perfect dodge to avoid. Purple light and blue light skills respectively involve moving the left stick back or forward with circle button.
Enemies’ normal attacks come in combos. A combo may consist of multiple hits or just one hit. However, only by perfectly parrying the final hit of the combo, the enemy will have a slight stagger. This stagger window is very brief. For example, with the chainsaw head boss, typically there is only enough time between its attacks for two hits. But if you perfectly parry the final hit of its combo, there is enough time for three hits after the stagger. The window is small but essential for advanced gameplay.

Enemies’ red light skills can be seen as intensified normal attacks with higher damage and more hits, making it very difficult to parry/perform perfect parries on them. However, enemies telegraph their red light skills before executing them, allowing you to interrupt directly with a Beta skill! Poor chainsaw head boss in my game, it can’t even unleash a single red light skill.
Furthermore, as mentioned earlier, when taking damage, it is shared between health points and shields, but blocking/parrying/perfect parrying results in:
Blocking only reduces the portion of damage taken by health points, with shield damage remaining unchanged.
Parrying completely negates the portion of damage taken by health points, with shield damage unchanged.
Perfect Parry not only completely negates damage to health points but also negates shield damage and reduces the enemy’s balance by one notch.
Dodge/Perfect Dodge
Perfect dodging can evade all types of attacks, including enemies’ normal attacks, red light skills, yellow light skills, blue light skills, and purple light skills.
However, at the same time, regular dodging is weak and doesn’t yield the same benefits as blocking/parrying. Regular dodging mainly serves as a quick movement method.
Additionally, based on the skill tree, performing a perfect dodge will charge a specific energy bar, not the Beta energy, which was hidden in the demo version.
Combo Strikes
Sword Star’s normal attacks operate on a combo system referred to in-game as combo strikes. These are formed by combining light strikes (square) and heavy strikes (triangle) in different sequences.
There are four sets of light strike combo starters and four sets of heavy strike combo starters.
Light strike combos start quickly, with short intervals between each strike, but feature a higher proportion of light strikes resulting in lower damage.
Heavy strike combos offer high damage but longer pauses between strikes, making it possible to get interrupted by enemy attacks before completing the combo.
Many equipment pieces (components and auxiliary vertebrae) in the game will provide bonuses like “27% increased damage for Combo Strikes above level 2,” so it would be best to focus on using higher-level combo strikes. Combos do not need to be completed all the way; you can choose to perform only the initial strikes based on the situation.
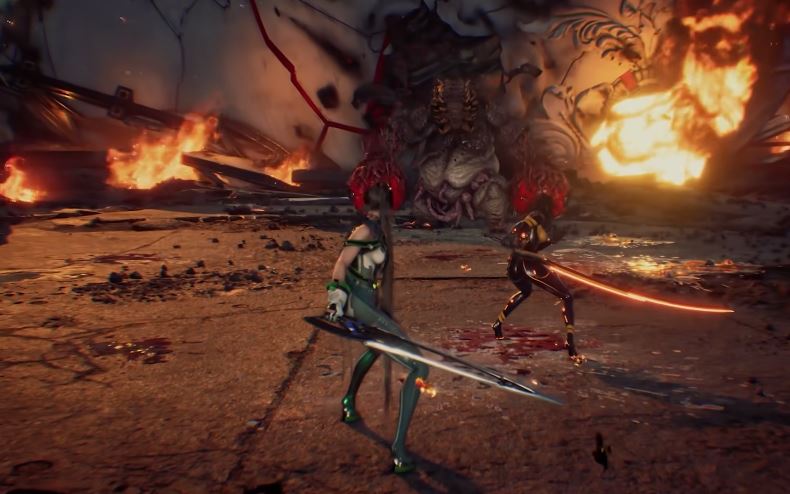
Enemies
Sword Star poses a relatively high level of difficulty. Without defense, being hit by 3-5 enemy attacks can lead to death.
It is recommended, like in Souls games, to lure enemies one by one, avoiding getting surrounded and overwhelmed.
Enemies also have health points, shields, and an additional balance value. Perfect parries and upgraded Beta abilities reduce the enemy’s balance by one notch. When the balance value reaches zero, the enemy will be interrupted regardless of the attack they are performing.
Regular mobs usually do not have shield values, and the damage will directly affect their health bars. However, bosses have high shield values, so it’s advised to use the cross Beta skill more at the beginning of the battle, as it enhances shield damage. After depleting the shield, the damage dealt to enemies significantly increases. Also, based on the current two bosses, boss shield values do not gradually recover. The only recovery occurs when transitioning phases, restoring the shield to full. Hence, early in the battle, you can focus on dealing damage to the shield without worry.
Additionally, in boss battles, blue light and purple light skills are easier to dodge, while red light skills are the most challenging, dealing high damage with multiple hits. The solution is to release a Beta ability directly to interrupt the enemy when they use a red light skill!