No Rest for the Wicked: How to Enter the Hidden Map of Unnamed Mountain Pass
Detailed Steps:
1: First, go to the elevator location at the Unnamed Mountain Pass and take the elevator on the left to the very top.
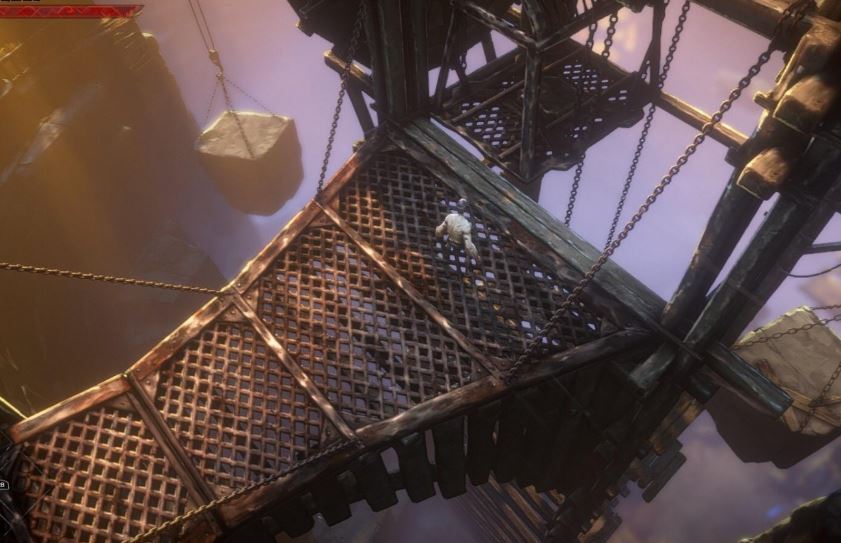
2: Press the switch on the left elevator once, then step back and wait for the right elevator to arrive. When the elevator is close to the ground, walk to the top of the elevator.
3: This step is crucial. Still using the image from Step 2, pay attention to the direction your character is facing. Face towards the beam on the right, which is in the southeast direction. Then, hold down the A key (sprint key) to climb up the beam (this part can be tricky. It’s best to climb up when the beam is visible. You need to climb twice to reach the top. Refer to the illustration in Step 4 for a clear view).
Climbing up can be challenging, here are some details: while facing the beam, move the joystick slowly to find the correct position. Some spots may not have collision volumes. Once you find the right spot, hold down the A key (sprint key) to climb up (note that your character needs to climb twice to reach the top. Keep holding the key until your character climbs the second level before releasing it. If you release it after climbing only one level, you might get stuck and won’t be able to reach the top).
It’s recommended to unequip all accessories and go lightly armed because you will likely die multiple times. Even after reaching the top, there are still monsters around, so don’t risk losing all durability after making it up by being unprepared.
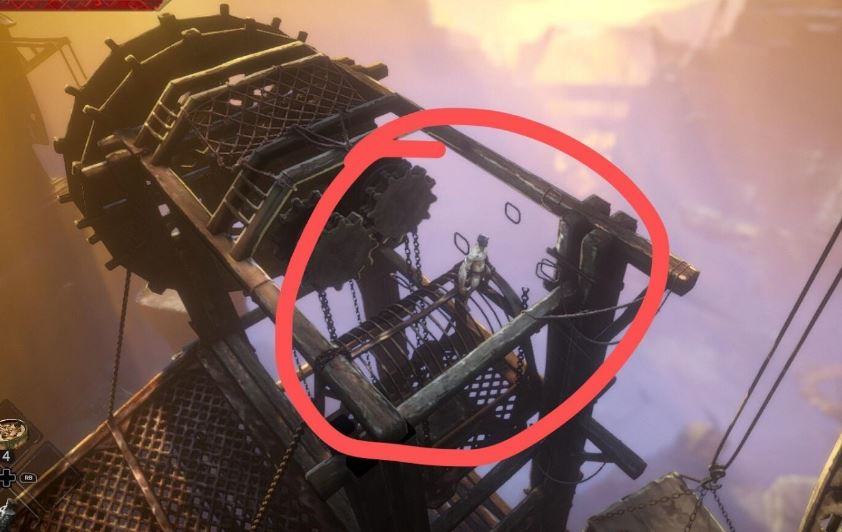
4: After climbing up, it will look like this. The next steps are relatively simple. Walk to the top of the beam on the right side and then make a big jump to the top of the crane on the right (you might die a few times, so find the right distance and angle).
5: Congratulations, you have reached the highest level in the world! Now you can explore freely.